Managed Identity for Connecting your Optimizely site to a Database in Azure
Traditionally, a connection string with a username and password has been used to connect an Azure Web App to an Azure SQL database. That works just fine, but passwords can be compromised, and do you really have control over who has access to the database?
By using Managed Identity to connect to Azure SQL, you avoid storing usernames and passwords in the application. Instead, the application is securely authenticated via Azure Entra ID. This provides better security, easier management, and reduces the risk of exposing sensitive data.
If your Optimizely site is hosted in Optimizely DXP, this is handled for you. This only applies if you are self-hosting directly in Azure.
My example setup includes a web application that will communicate with a database.
- Azure SQL Server: my-sql-server
- Azure Database: my-database
- Azure App Service: my-app-service
1. Create Managed Identity
I start by creating a resource of type User Assigned Managed Identity, and name it my-app-service-uami.
Copy the Client ID and Object ID of the resource, as we’ll need them later.
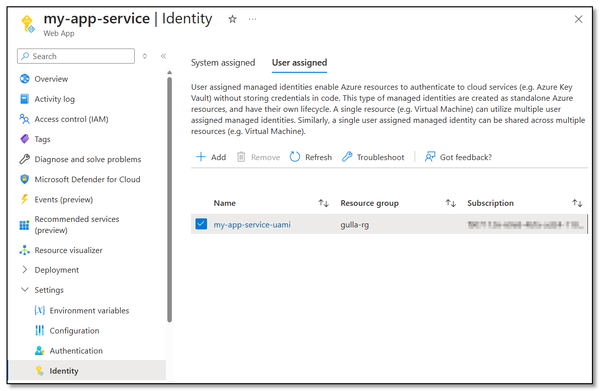
2. Link Managed Identity to the App Service
In the App Service, I find Settings and Identity in the left-hand menu, select User assigned, and choose the resource I created in the previous step.
If you are using a deployment slot, link the same managed identity to the slot as well.
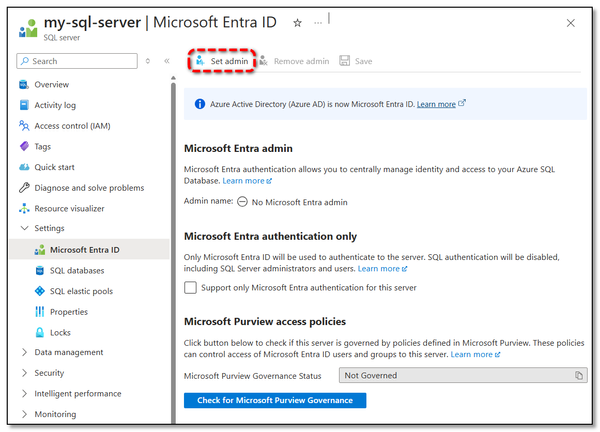
3. Set Microsoft Entra Admin
We need an admin user with AD login to perform the next step, so I locate my database server, find Settings and Microsoft Entra ID in the left-hand menu, and set up an admin user.
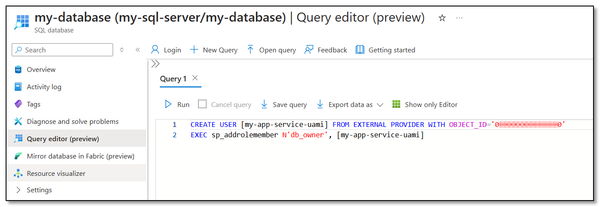
4. Create Database User
The admin user with AD login is now used to log in, preferably via the Query editor in the Azure Portal.
Create a user with sufficient permissions for your use case. The username should match the Managed Identity resource you created in step 1, and also use the Object ID from that resource.
It is wise not to grant the database user more privileges than necessary. If the db_datareader role is sufficient, don’t assign more.
5. Replace the connection string
Replace the connection string, and include the Client ID from the resource you created in step 1
Data Source=tcp:my-sql-server.database.windows.net,1433;Initial Catalog=my-database;Authentication=Active Directory Managed Identity;User Id=[Client ID of the user identity];Trusted_Connection=False;Encrypt=True;Connection Timeout=30;